

Blackout Packages

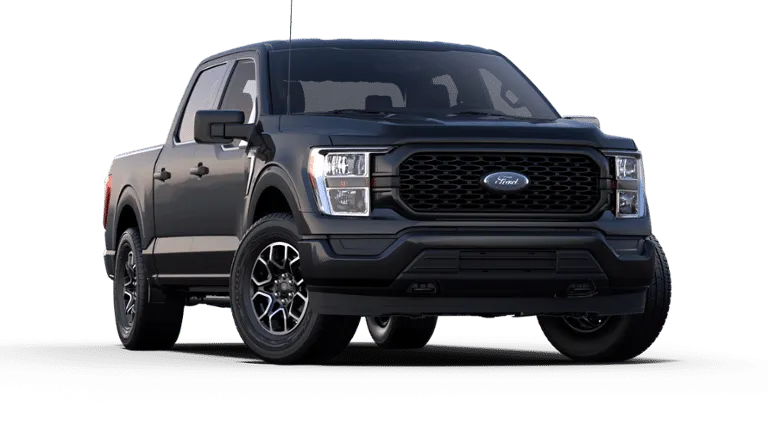
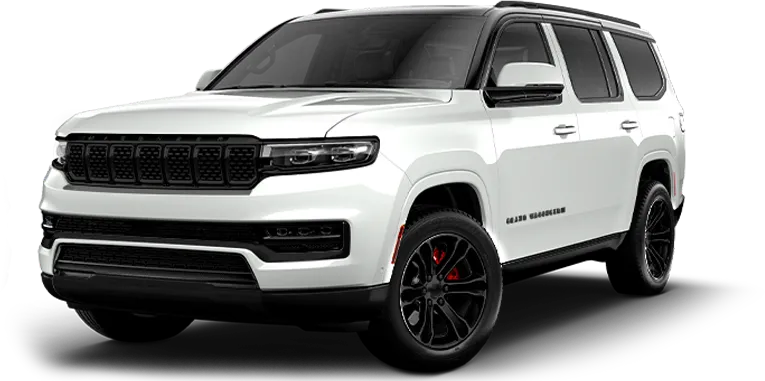

A blackout package is a customization option that involves "blacking out" various parts of a vehicle, such as the wheels, grille, trim, emblems, and other exterior components. The specific steps involved in a blackout package will vary depending on the vehicle and the parts being customized, but here are some general steps that may be involved:
Disassembly: The parts to be blacked out are removed from the vehicle and disassembled if necessary to ensure that all surfaces are properly coated.
Cleaning and preparation: The parts are thoroughly cleaned and degreased to remove any dirt, oil, or other contaminants. They are then sanded or prepped with a chemical treatment to create a rough surface that allows the paint or coating to adhere properly.
Painting or Coating: The parts are then painted or coated with a specialized paint or material designed to provide a durable, long-lasting finish. This may involve using a spray gun or other specialized equipment to apply multiple layers of paint or coating to achieve the desired level of coverage and finish.
Drying and Curing: After the paint or coating has been applied, the parts are left to dry and cure for a specified period of time to ensure that the finish is fully set and won't chip, peel, or wear away over time.
Reassembly: Once the paint or coating has fully cured, the parts are reassembled and installed back onto the vehicle.
Overall, a blackout package can be a great way to give your vehicle a unique and customized look, but it requires specialized knowledge and equipment to ensure that the finish is durable, long-lasting, and looks great. By having your blackout package installed by a qualified professional, you can help ensure that your vehicle stands out from the crowd and looks its best on the road.
Assess the vehicle to determine which chrome parts will be removed or covered up. This may include the grille, window trim, door handles, side mirrors, and other chrome accents on the exterior.
Gather the necessary tools and materials for the job, such as trim removal tools, sandpaper, primer, paint, and clear coat.
Clean the surfaces to be painted thoroughly to remove any dirt, debris, or wax that may interfere with the adhesion of the paint.
Use a trim removal tool to carefully remove any chrome parts that will be replaced or painted over. Take care not to damage any surrounding surfaces or components.
Sand the surfaces to be painted lightly to create a rough surface for the primer to adhere to. Wipe away any dust or debris.
Apply a primer to the sanded surfaces to provide a base for the paint to adhere to. Allow the primer to dry according to the manufacturer's instructions.
Apply several thin coats of paint to the primed surfaces, allowing each coat to dry completely before applying the next. Use a high-quality automotive paint that matches the color of the vehicle.
Apply a clear coat over the painted surfaces to protect the paint and create a glossy finish. Allow the clear coat to dry completely before handling or re-installing any parts.
Re-install any parts that were removed, either by replacing them with new non-chrome parts or by re-installing the original parts that were painted over.
Inspect the finished product and make any necessary touch-ups or adjustments to ensure a high-quality, professional-looking result.